HANGING WALL ART
Are you looking for a way to spice up your walls and showcase your personality? If so, you might consider hanging art or photographs on your walls. This is a great way to add colour, texture, and interest to your space and express your style and preferences. However, hanging art and photography on your walls can also be challenging.
Knowing how to choose the right size, style, or layout for your wall or how to create a cohesive and harmonious look can be challenging. This blog will give tips and examples on creating a stunning gallery wall that reflects your taste. Whether you want to go for a simple, elegant, or that eclectic look.
ART TO HANGING ART
Hanging art on your walls is not just a matter of personal preference but also a skill requiring planning. However, some general guidelines can help you hang your art at the perfect height, width, and space for your wall.
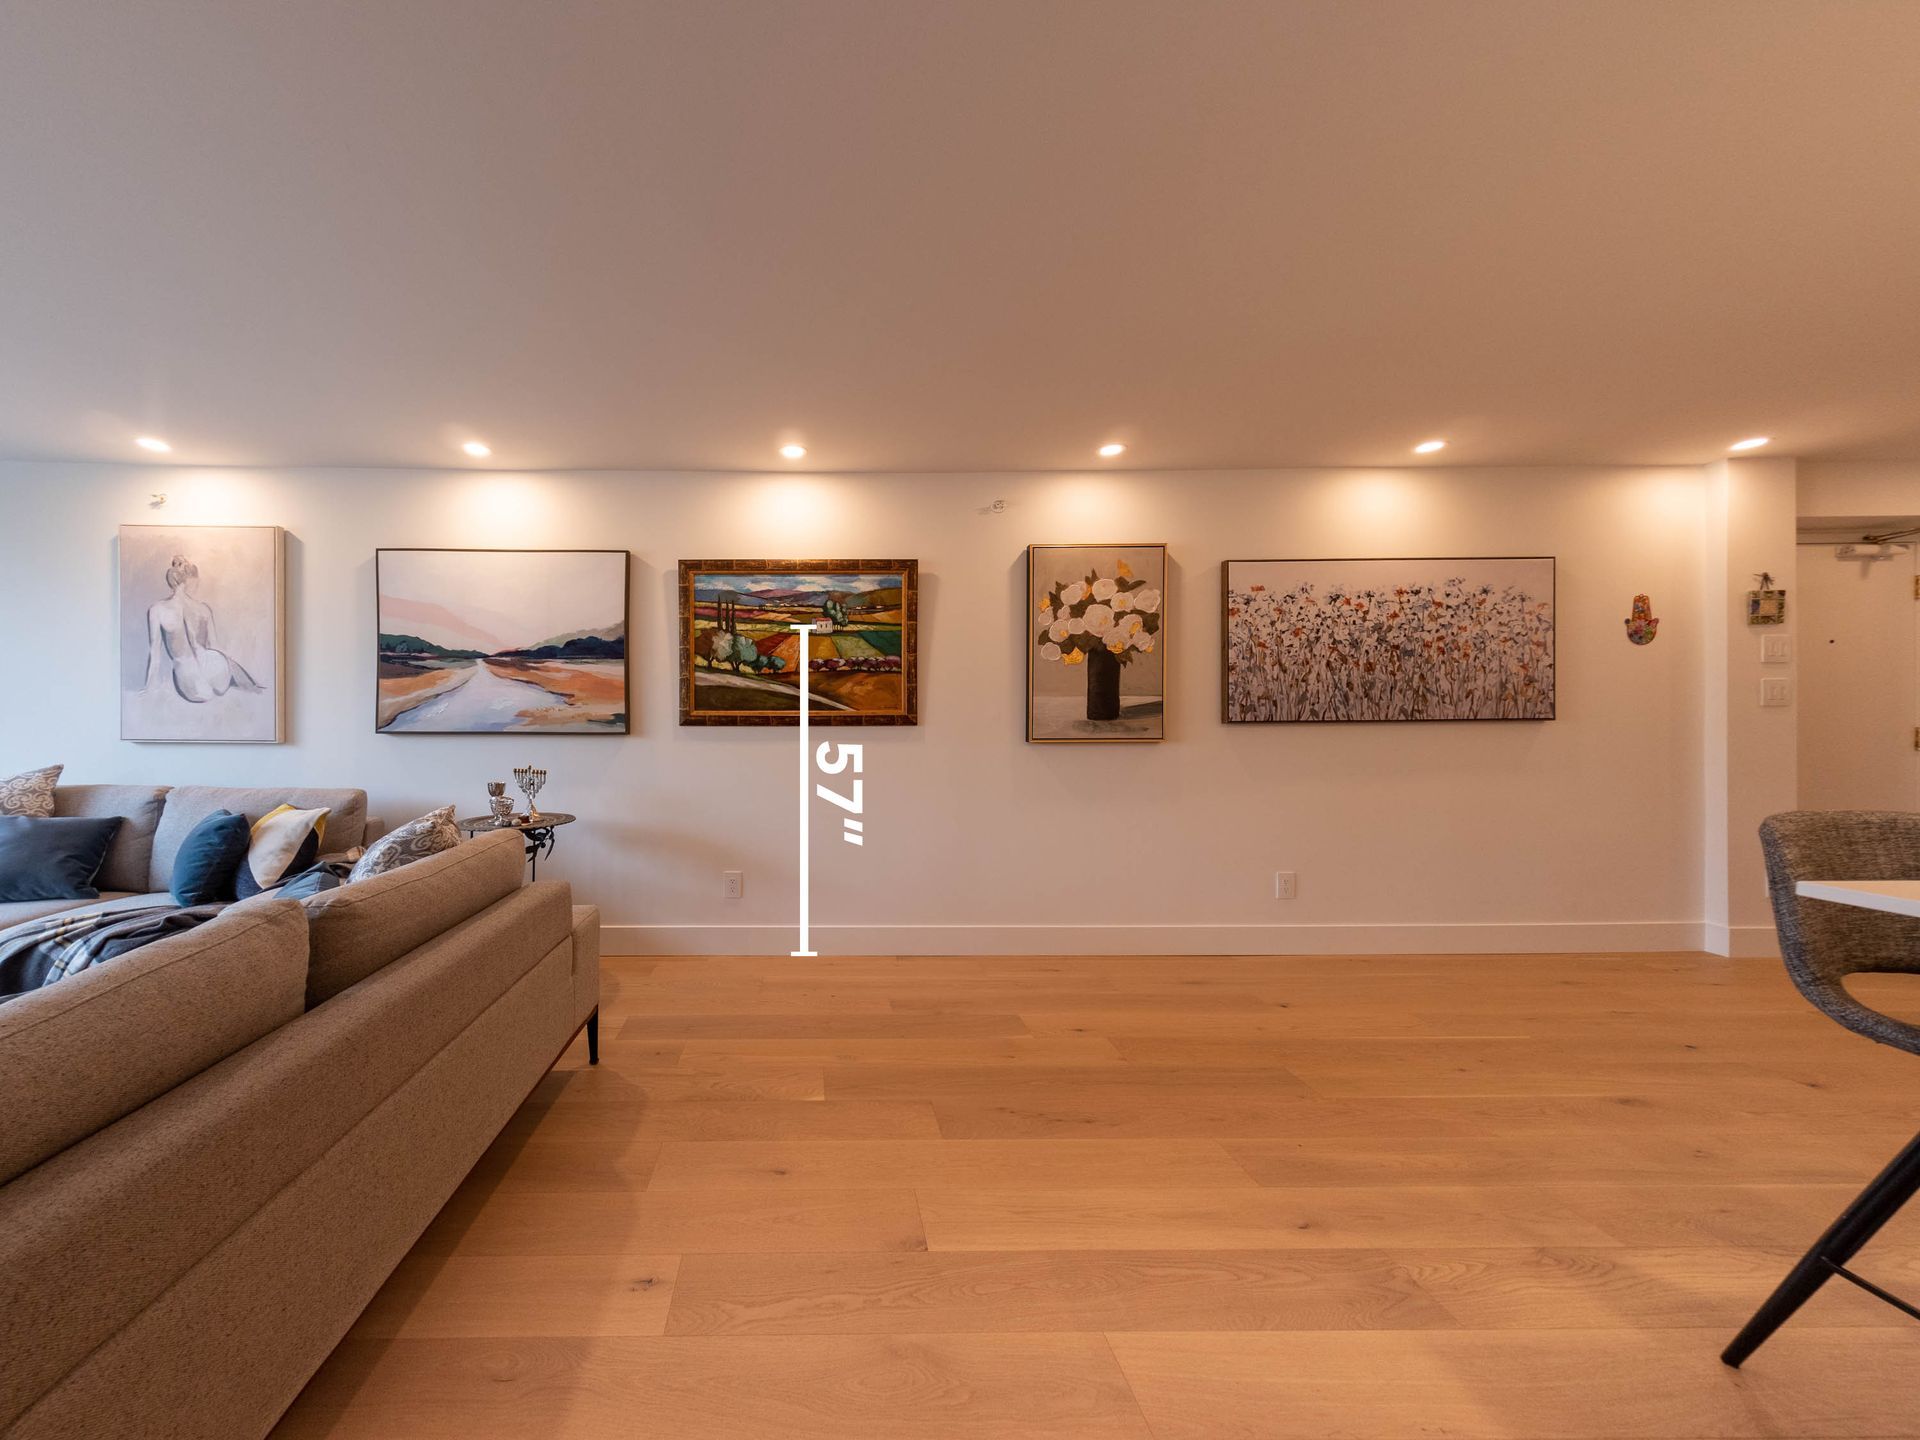
One of the most common rules is to hang your art at eye level, about 57 inches from the floor for most people. This allows for a comfortable and natural viewing experience for most people. However, this rule can vary depending on the height of your ceiling and if you have any furniture you need to hang art or photographs above.
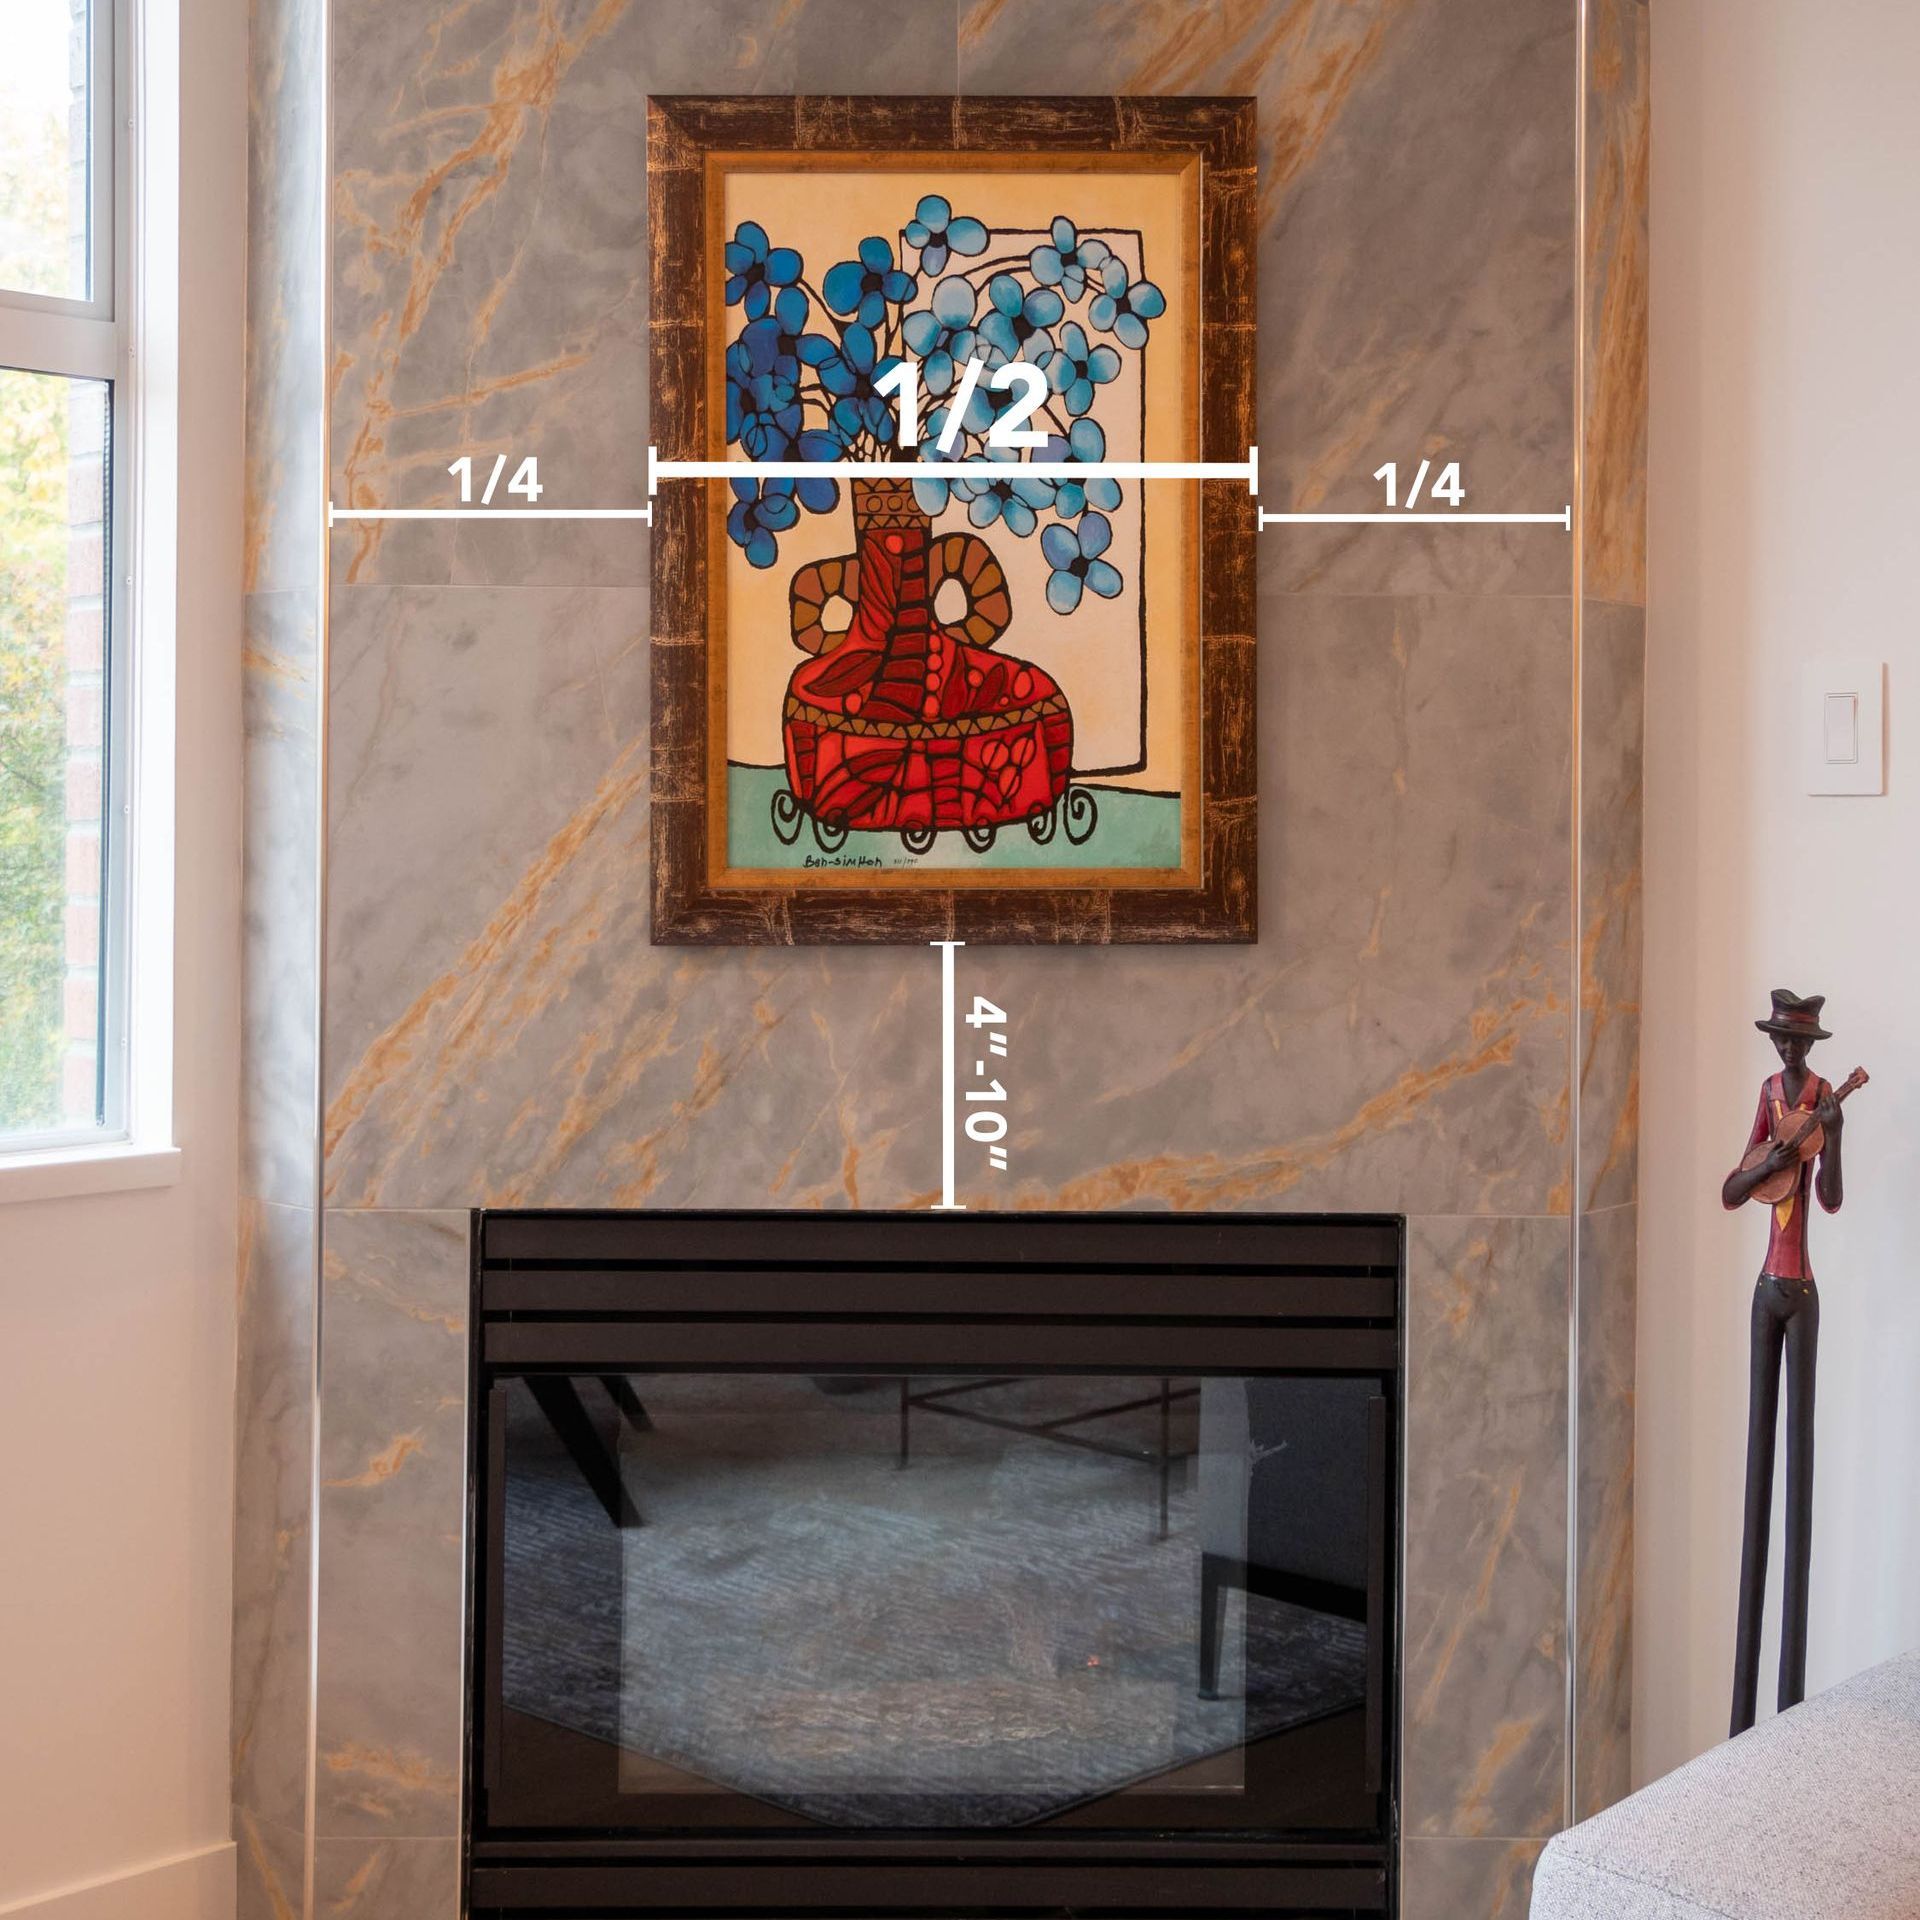
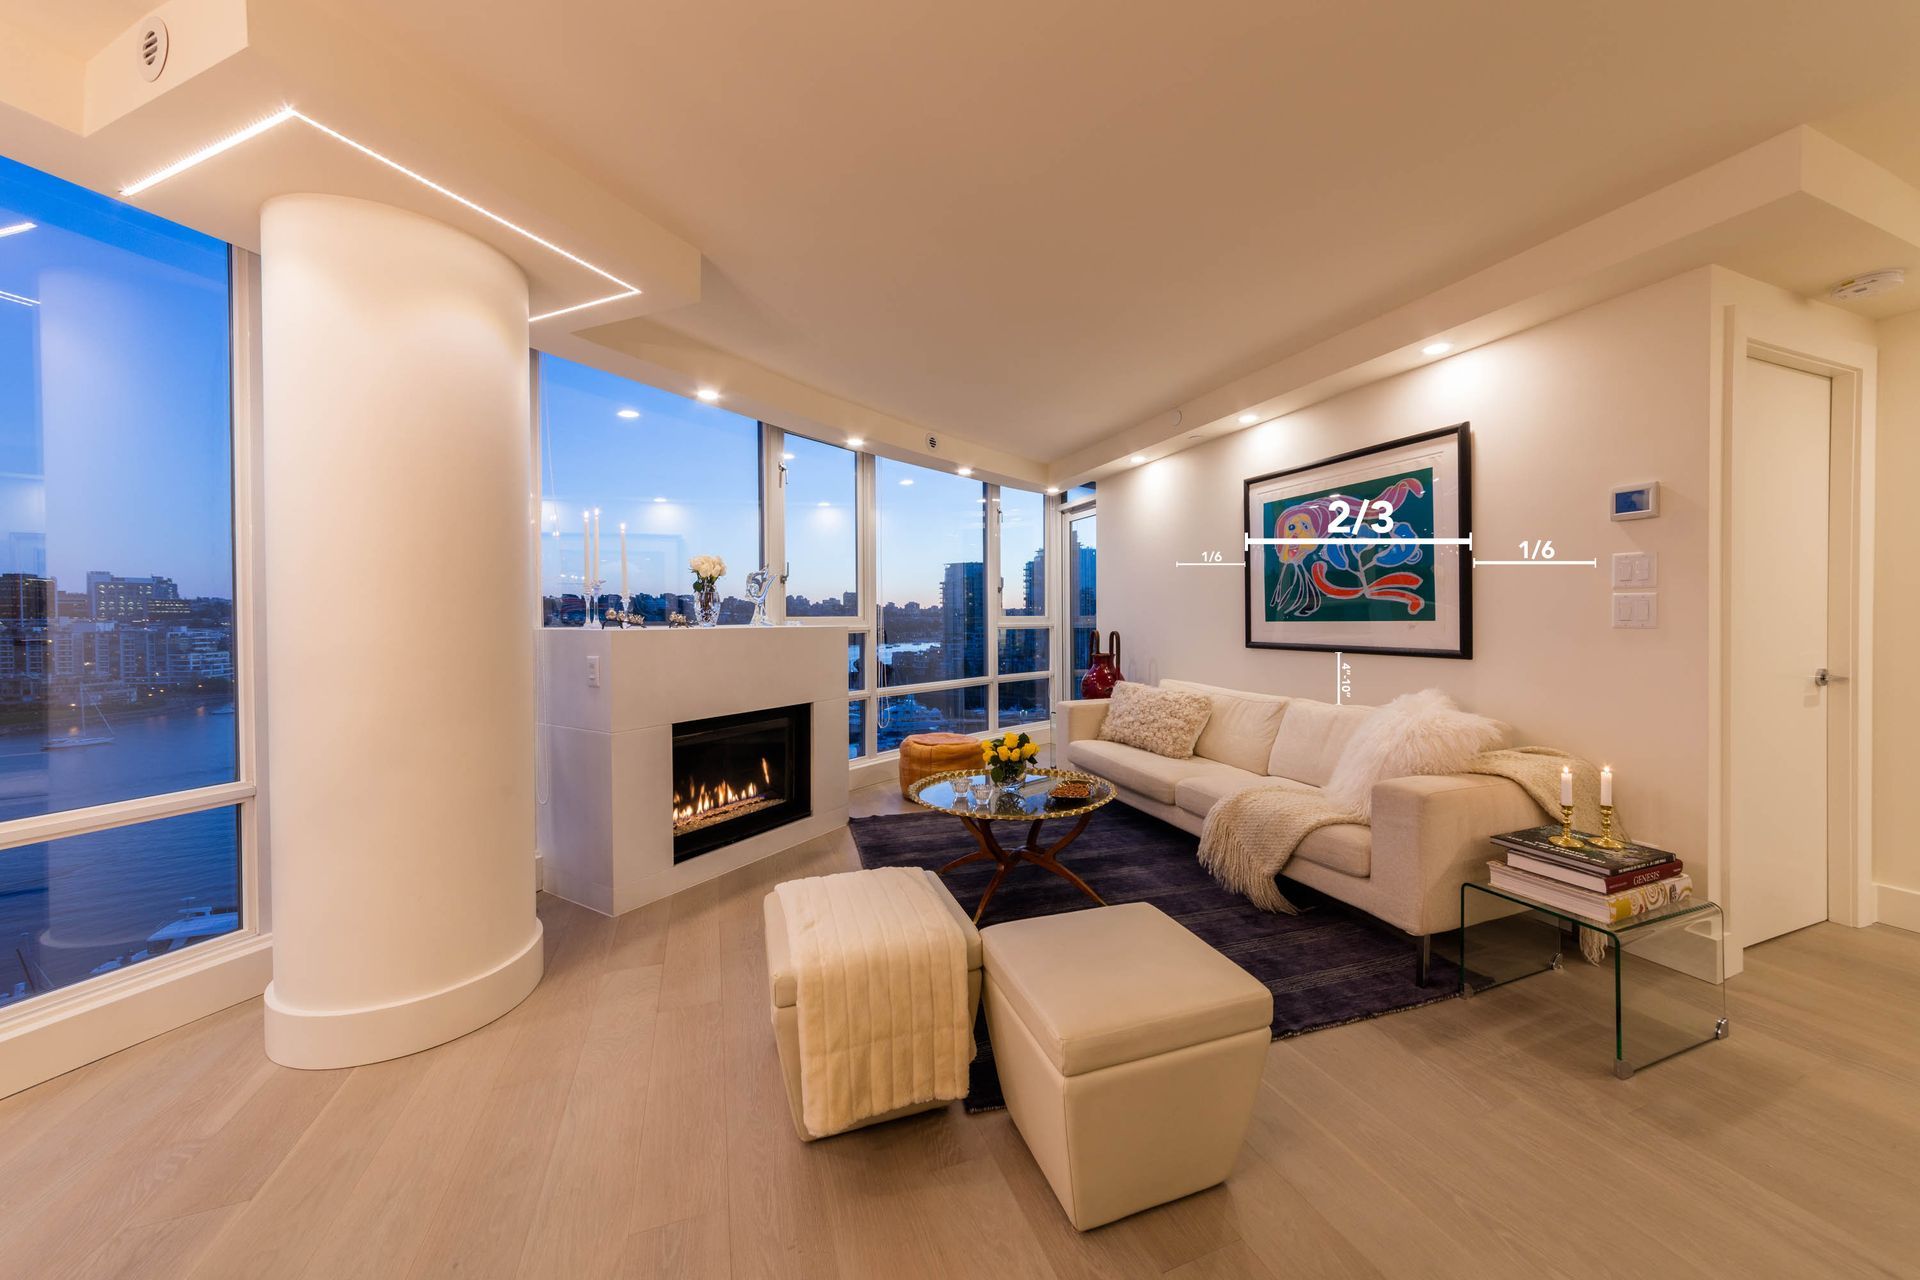
For example, if you are hanging art above a sofa or a bed, you should leave space between the top of the furniture and the bottom of the frame, around 4 to 10 inches. You should also make sure that the art is proportional to the furniture. About two-thirds to three-quarters of its width is a general guide.
THEME & STYLE
One of the challenges of creating a gallery wall is to choose a theme of art that suits your space and your style. A theme can help create a cohesive and harmonious look for your wall. There are different ways to choose an art theme for your home.
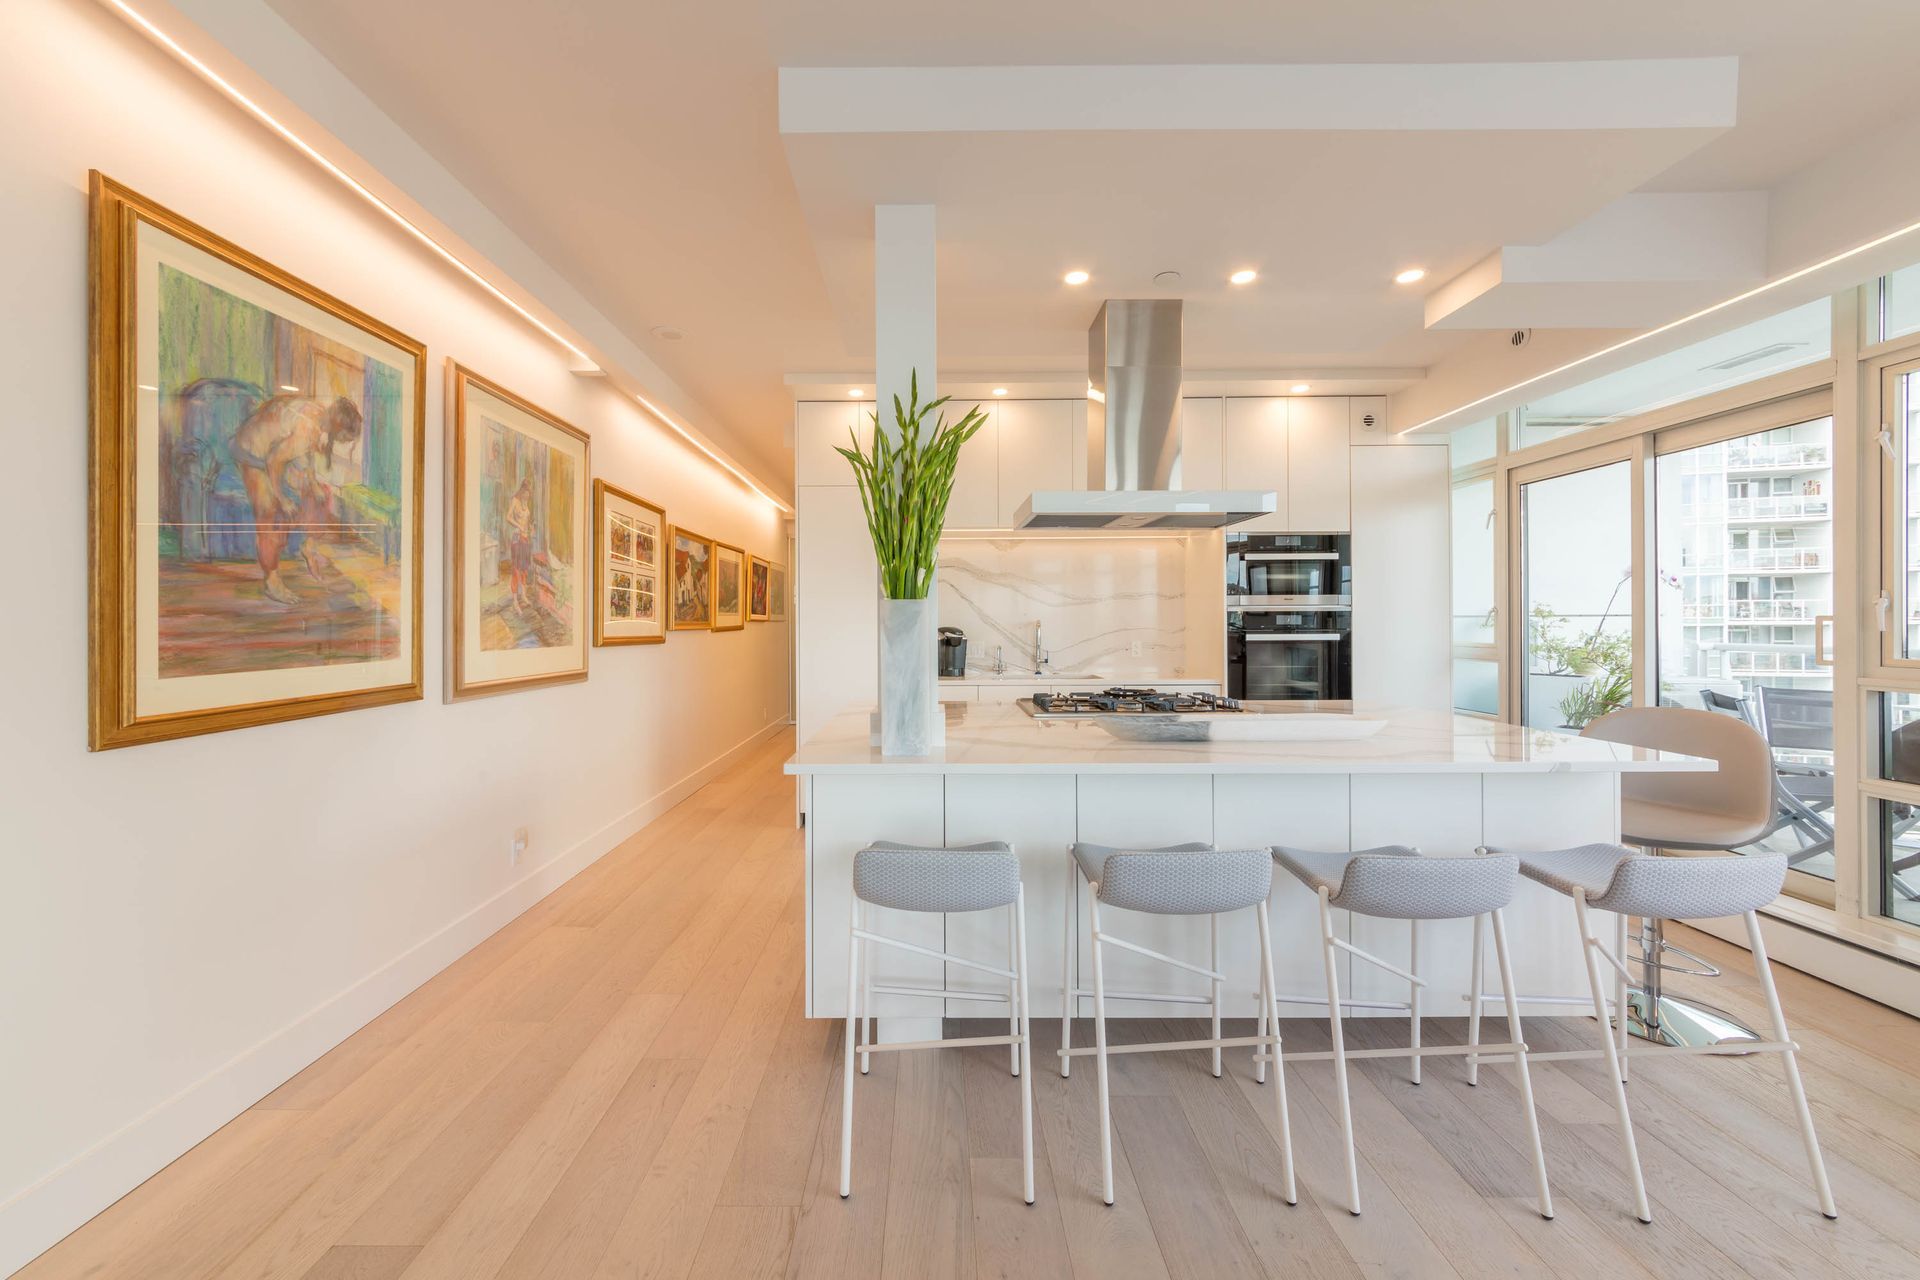
One way is to select a colour theme and use pieces that complement or contrast that colour theme. You can see this in this home in Marinaside Crescent, where a series of colourful pastel art pieces with matching gold frames completes the theme along this wall.
Another popular theme is selecting a theme based on a subject, such as travel, nature or family. Then utilize other pieces that match or complement the chosen subject.
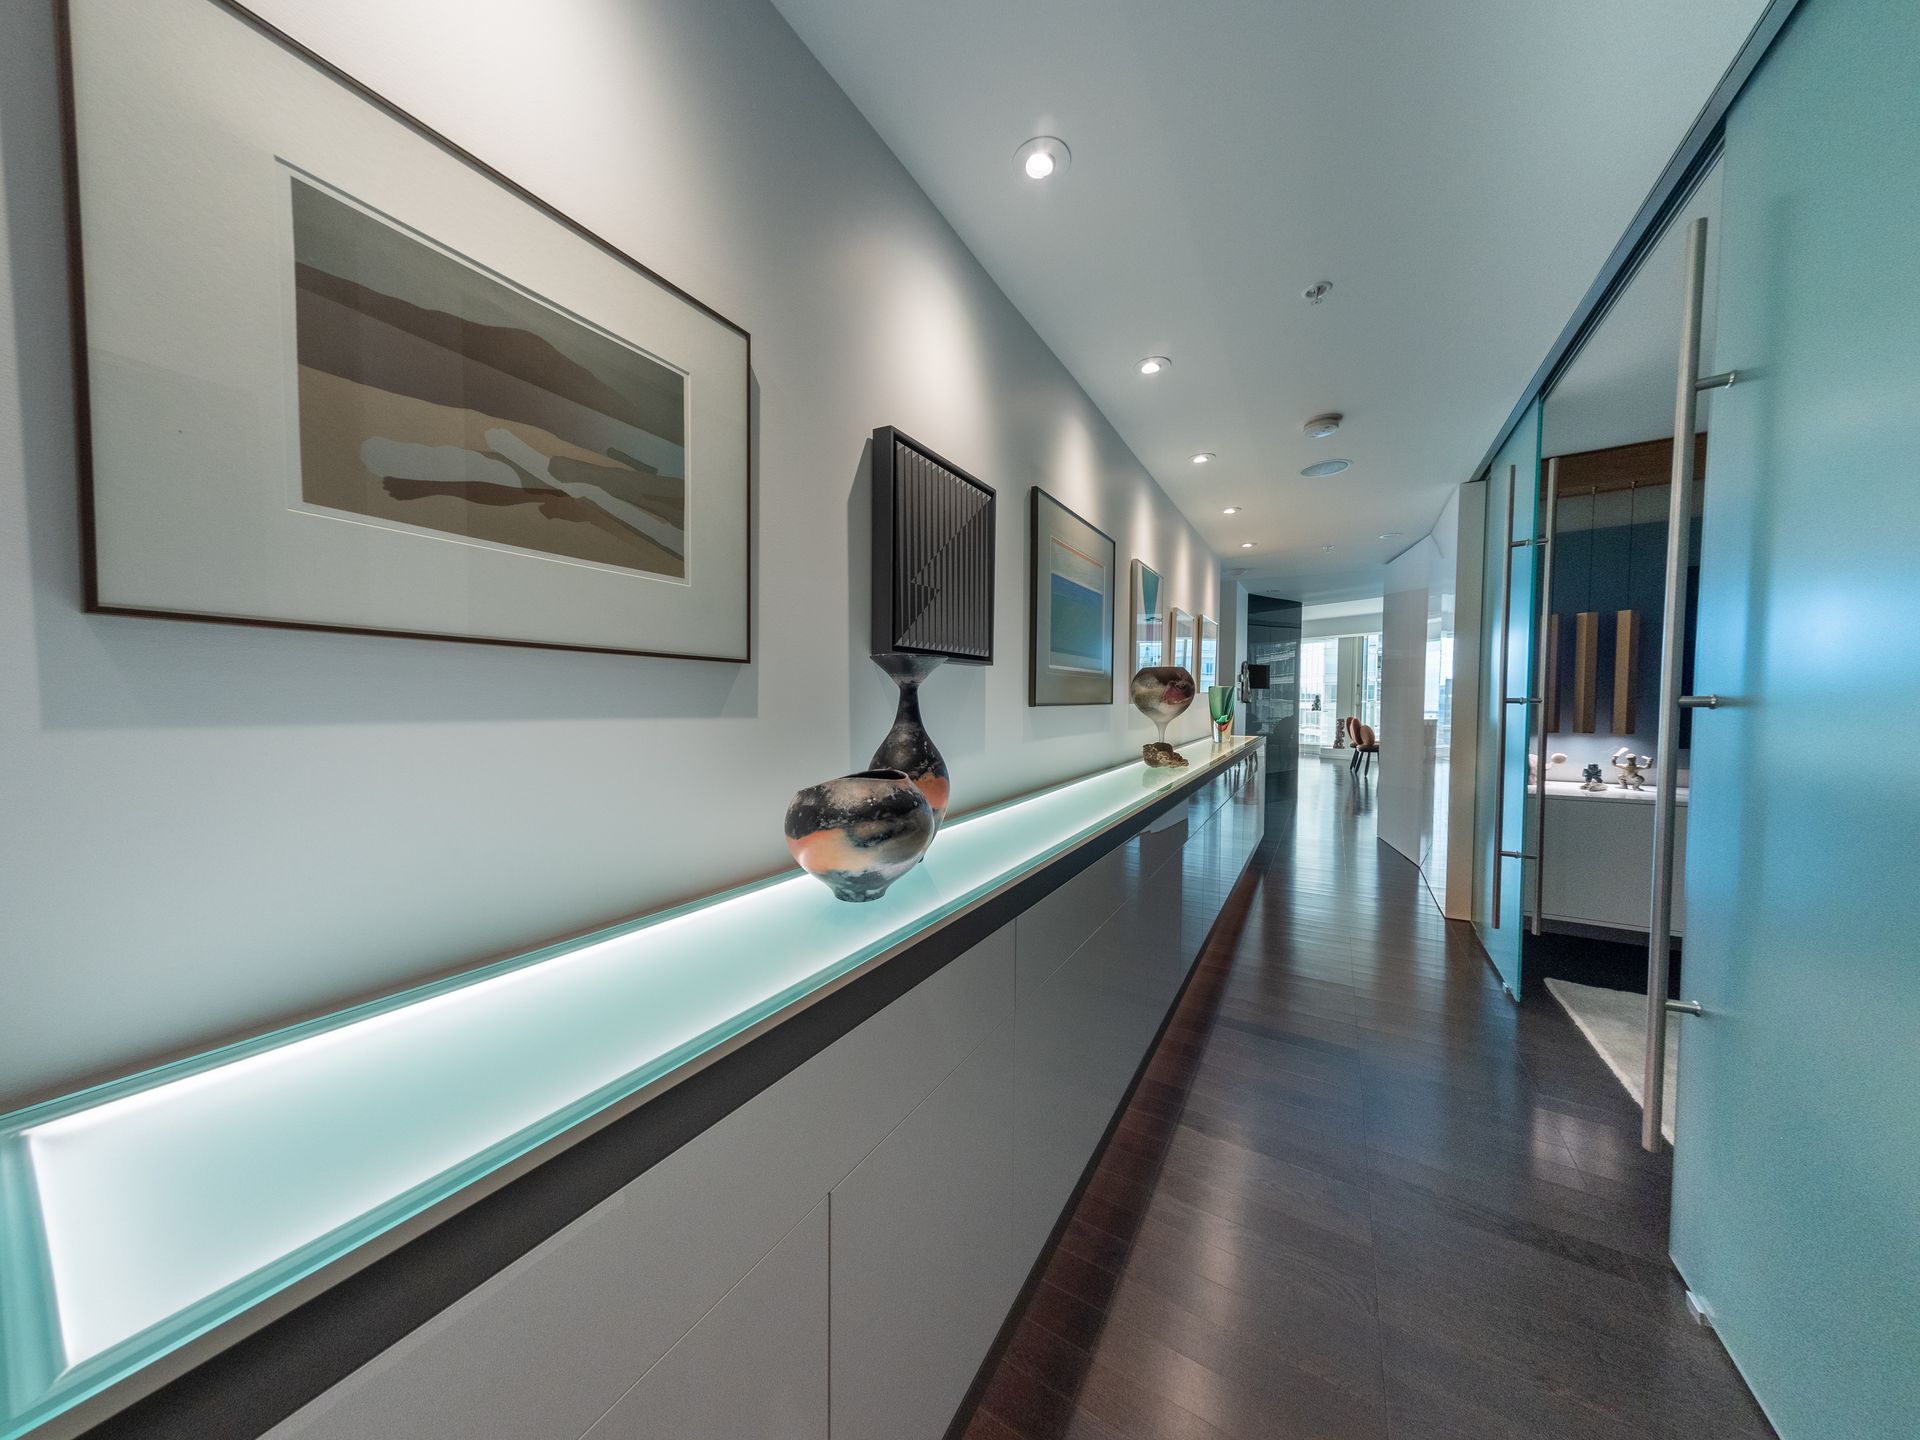
Add texture to your theme by combining different art forms, such as free-standing sculptural pieces. As seen in our Georgie Award-nominated project in West Cordova Street.
TEST & RE-TEST
Once your theme is nailed down (pun totally intended), you next want to test your layout. Again, there are a few different ways of doing this.
One method is to arrange your frames on the floor in front of the wall and experiment with different arrangements until you find one you like. You can then take a photo of the layout and use it as a reference when hanging your art. Another method is to trace the outlines of your frames on kraft paper or newspaper and cut them out. You can then tape the cutouts to the wall with painter's tape and move them around until you find the best layout from a size perspective.
A third method is to use a wall art visualizer app that allows you to upload a photo of your wall and a photo of your art and see how they will look together. Some apps also let you adjust the lighting, angle, and wall colour to create a realistic simulation.
One of the advantages of
using an Interior Designer is that we can 'hang' all of your art and photographs in your design in our computer models and show you in a 3D walk through how your art will appear on the wall well before we even start knocking down doors.
HANGING OUT
When it comes to hanging your art, you want to ensure you have the right tools and fixing devices for your art. You can use nails, screws, or hooks that can be quickly hammered or screwed into the wall for light and small artwork.
For heavier and larger artwork, you may need anchors, toggles, or brackets to support more weight and secure your art to the wall. Make sure you have a level, measuring tape and a hammer. If you don't have a level, you can download apps that will do a good enough job on your phone.
Use a pencil to mark where you want to hang your pictures on your wall. Next, drive a nail or place a hook on the spot so it hangs about 1⁄4 inch from the wall. Next, set your wall art or photograph on the nail or hook and use your levelling device to ensure it is level. Repeat this process for each piece of art until you complete your gallery wall.
SIT BACK & ENJOY
We hope you have learnt a thing or two about hanging art. Although we can help you design and build your home, we can refresh your home as interior designers. And as part of our service, we can hang your art for you. Contact us today and tell us about your art and what you want to hang.